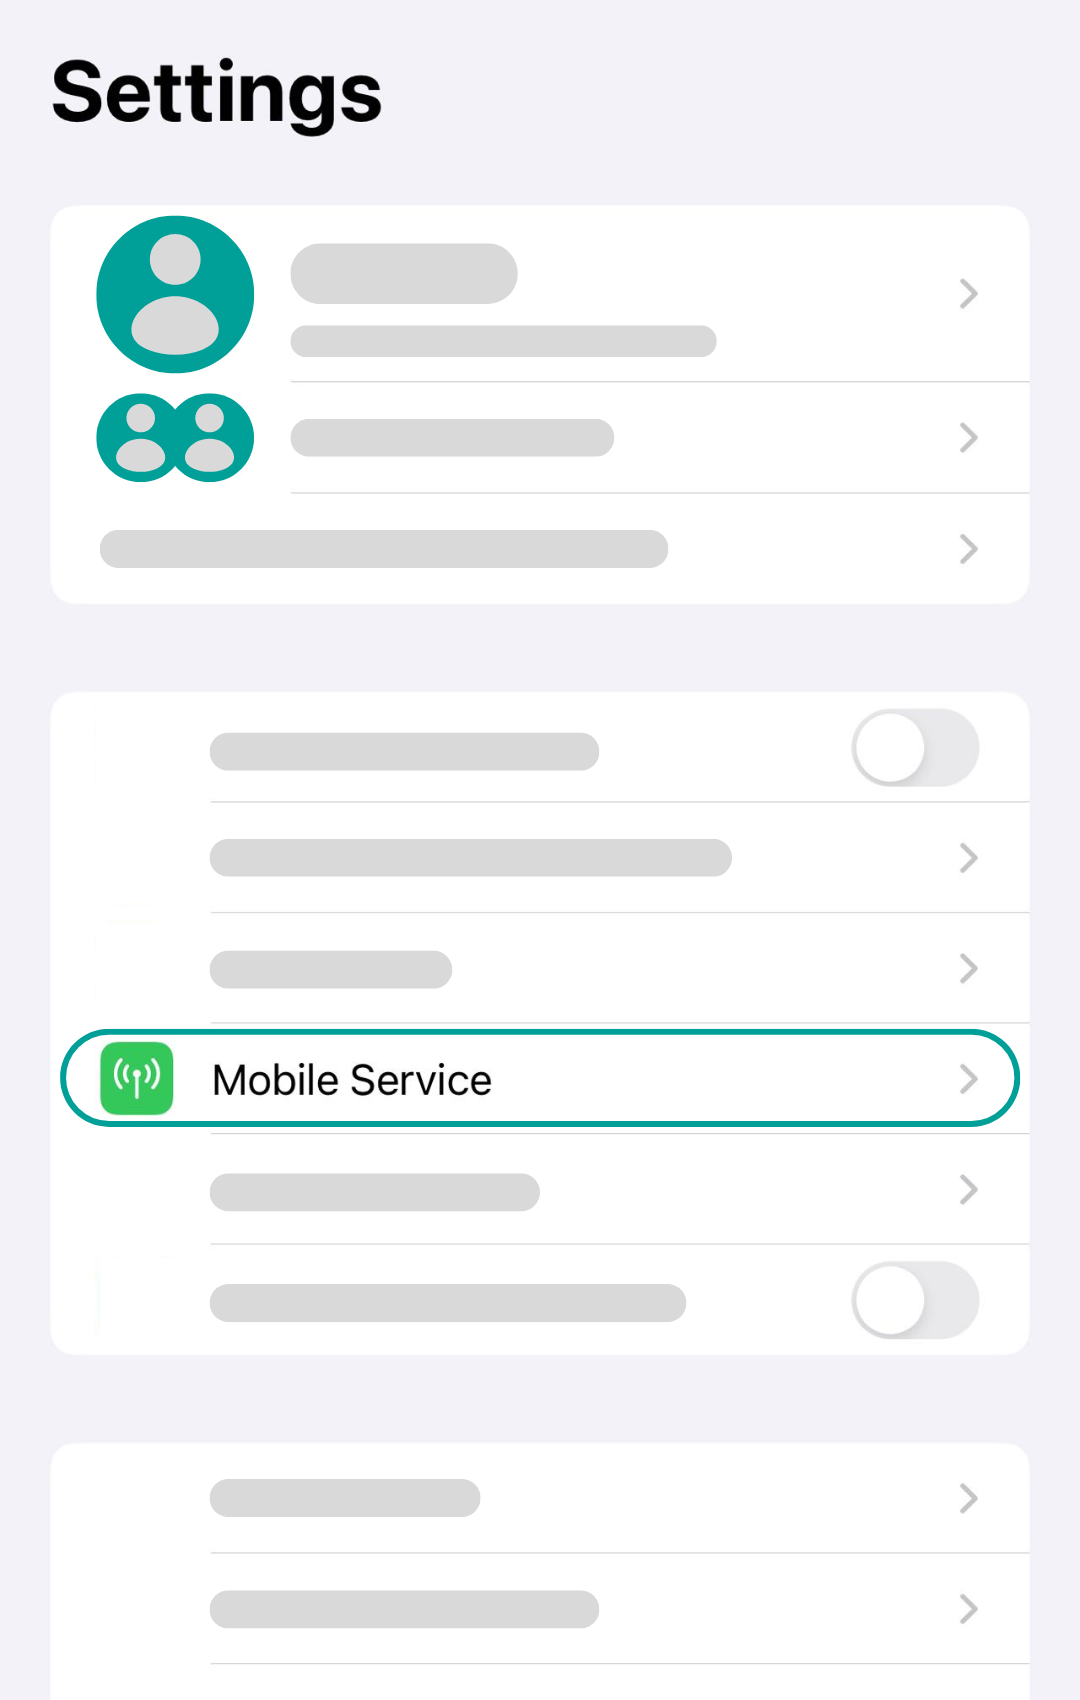
Go to your device Settings and choose the 'Mobile Service' section.
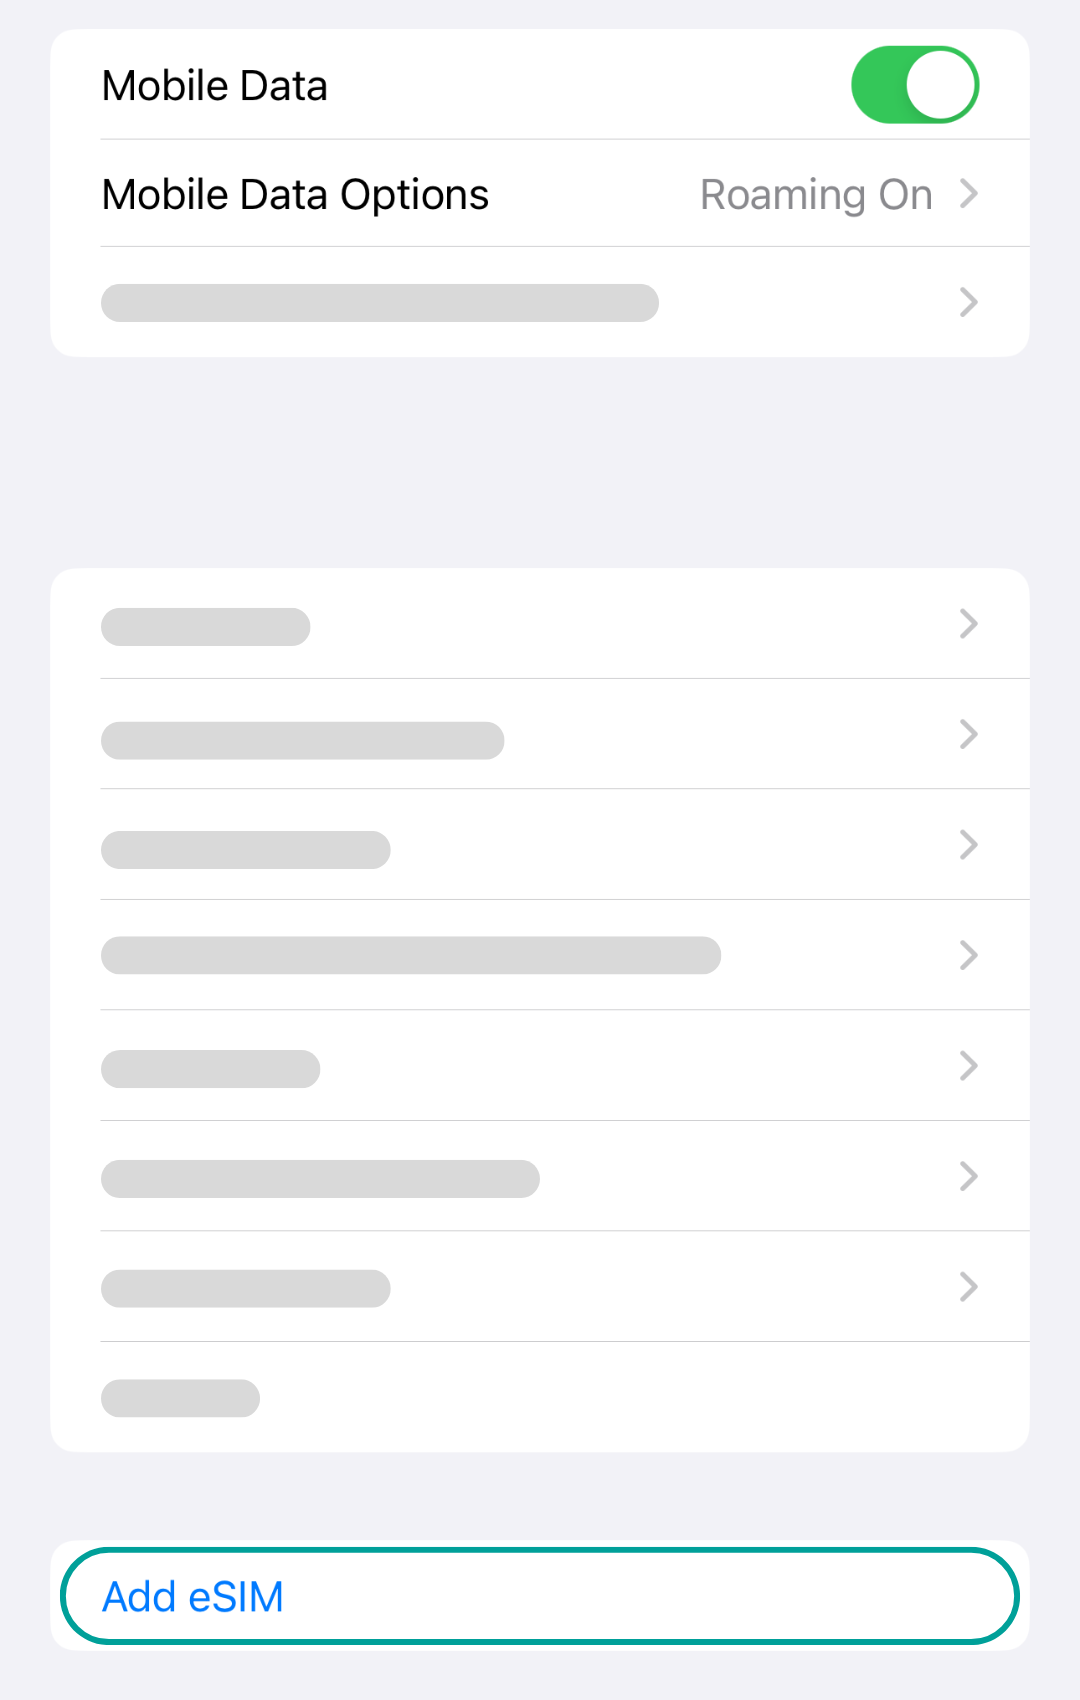
Locate and click on the 'Add eSIM' section.
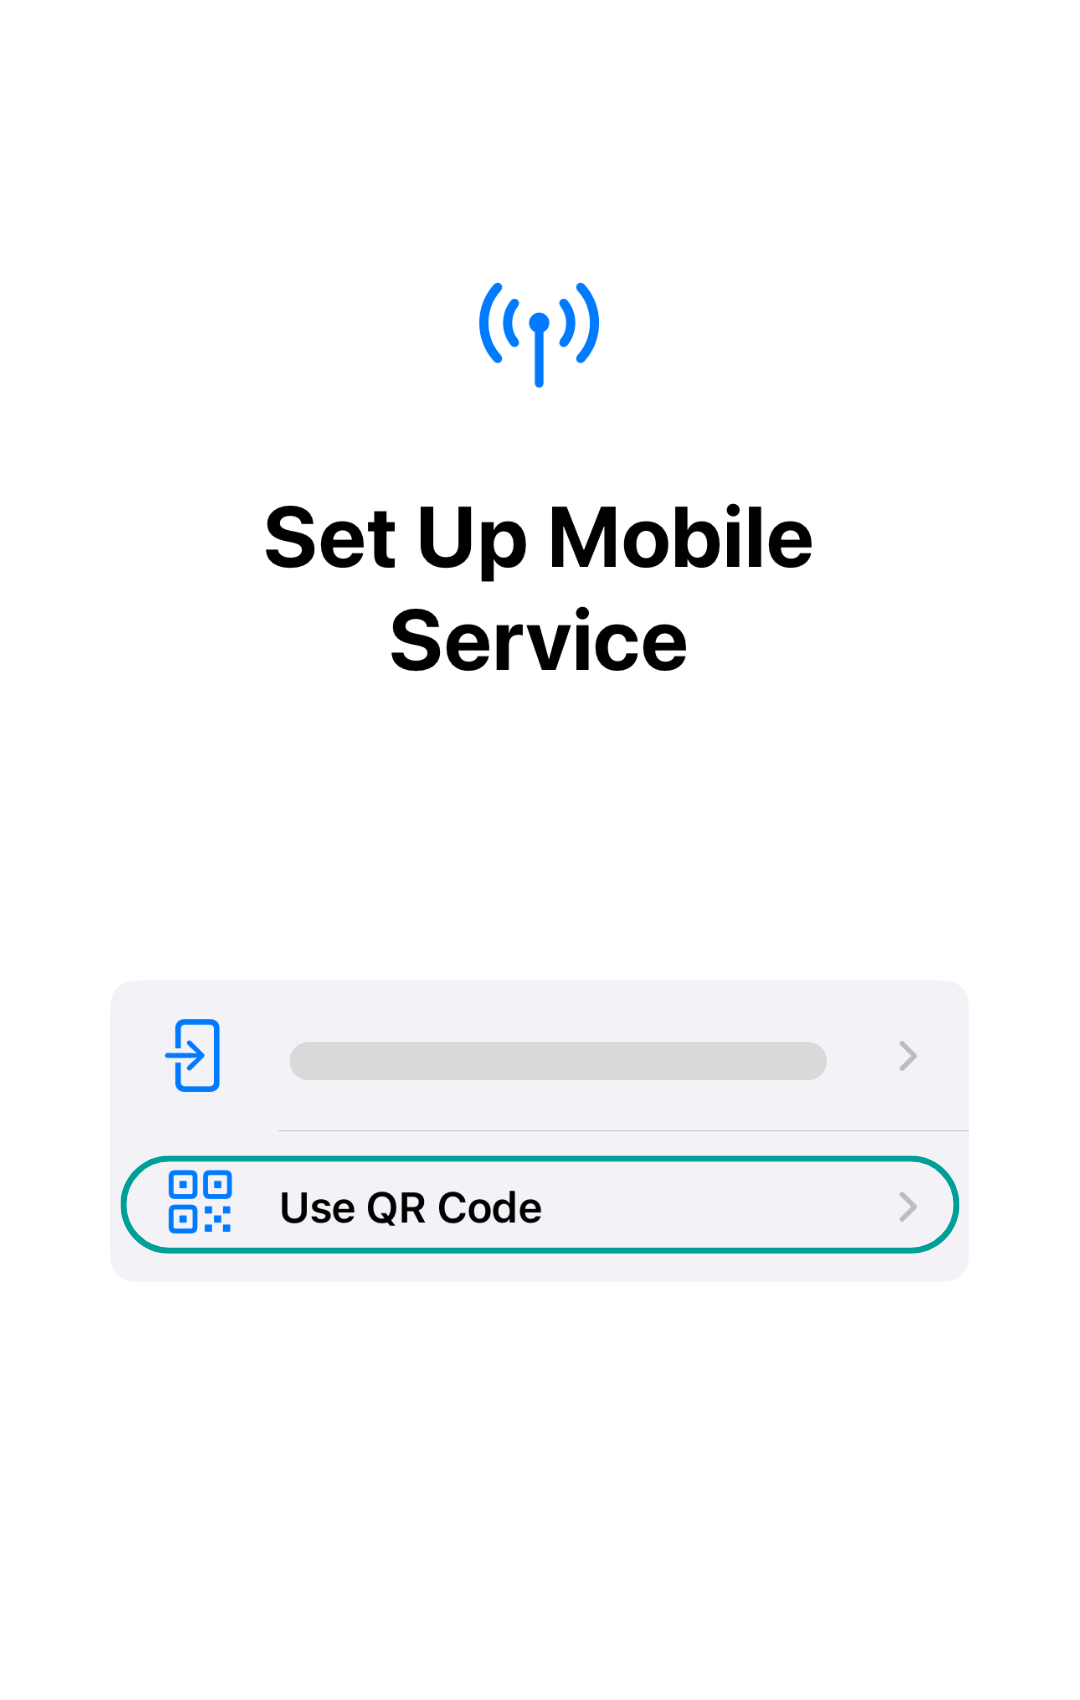
Choose the 'Use QR Code' option.
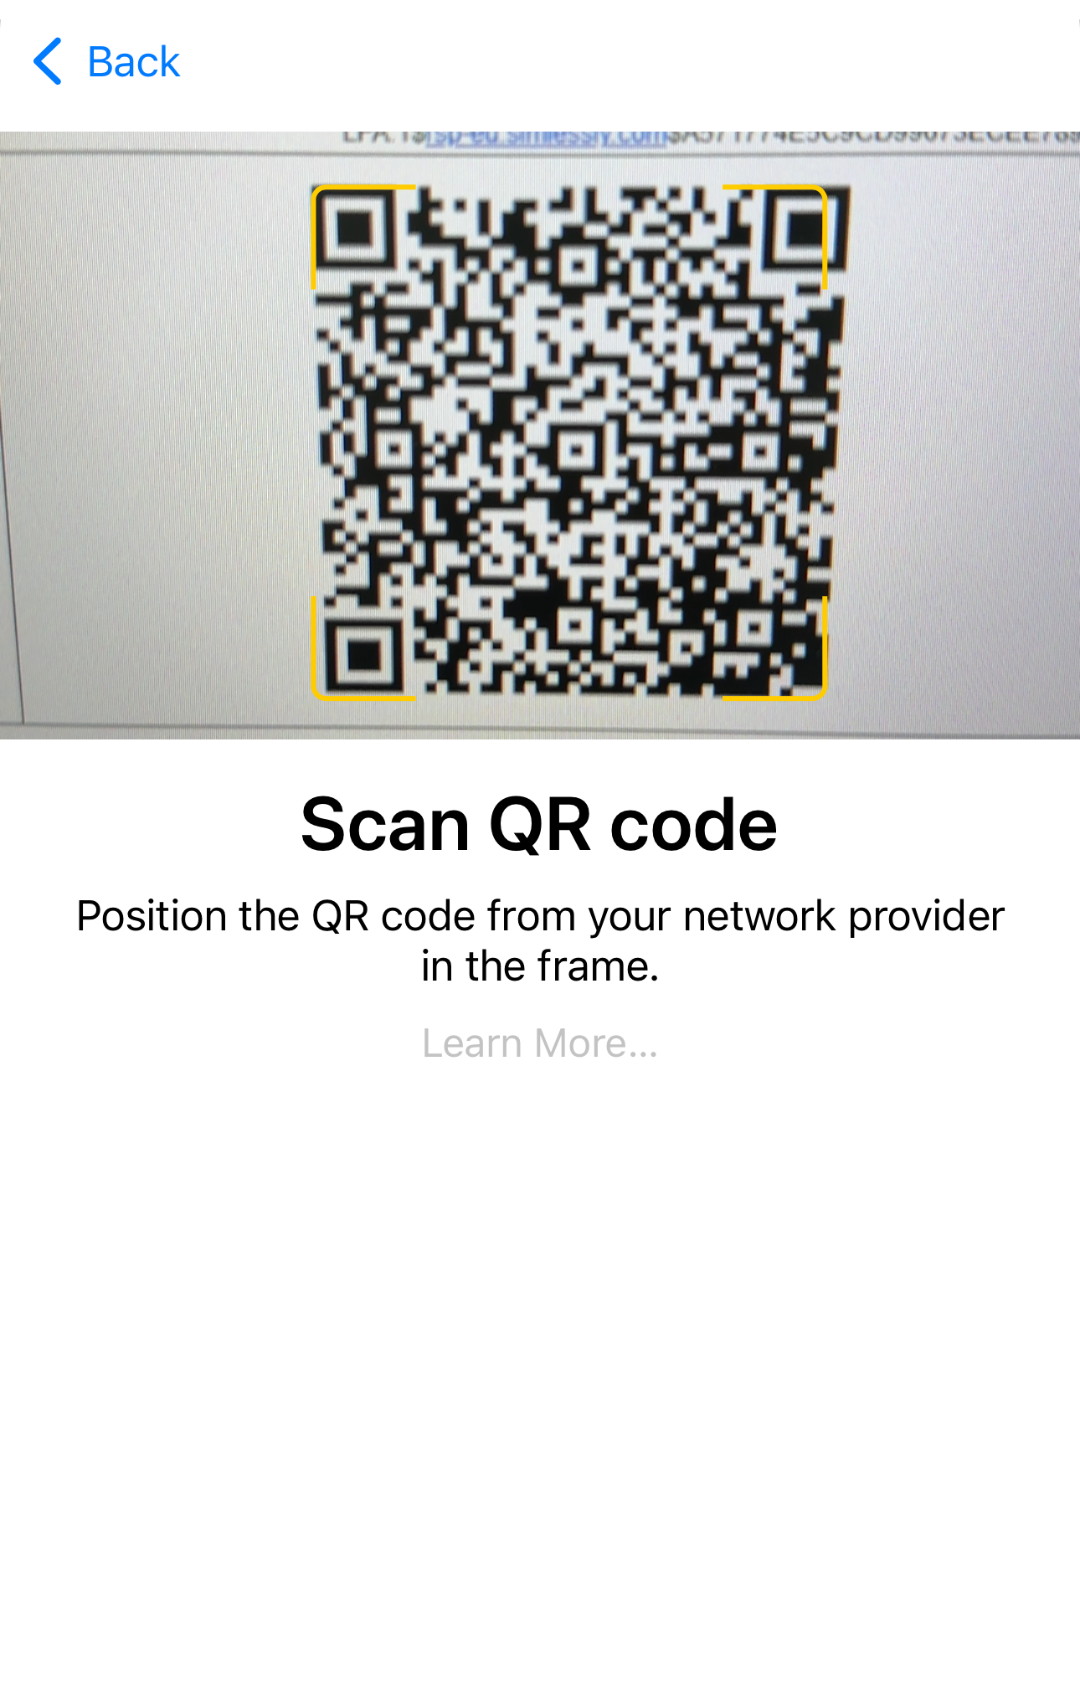
Go to your email account and find the eSIM QR code that we have sent to you. Afterwards, scan the QR code.
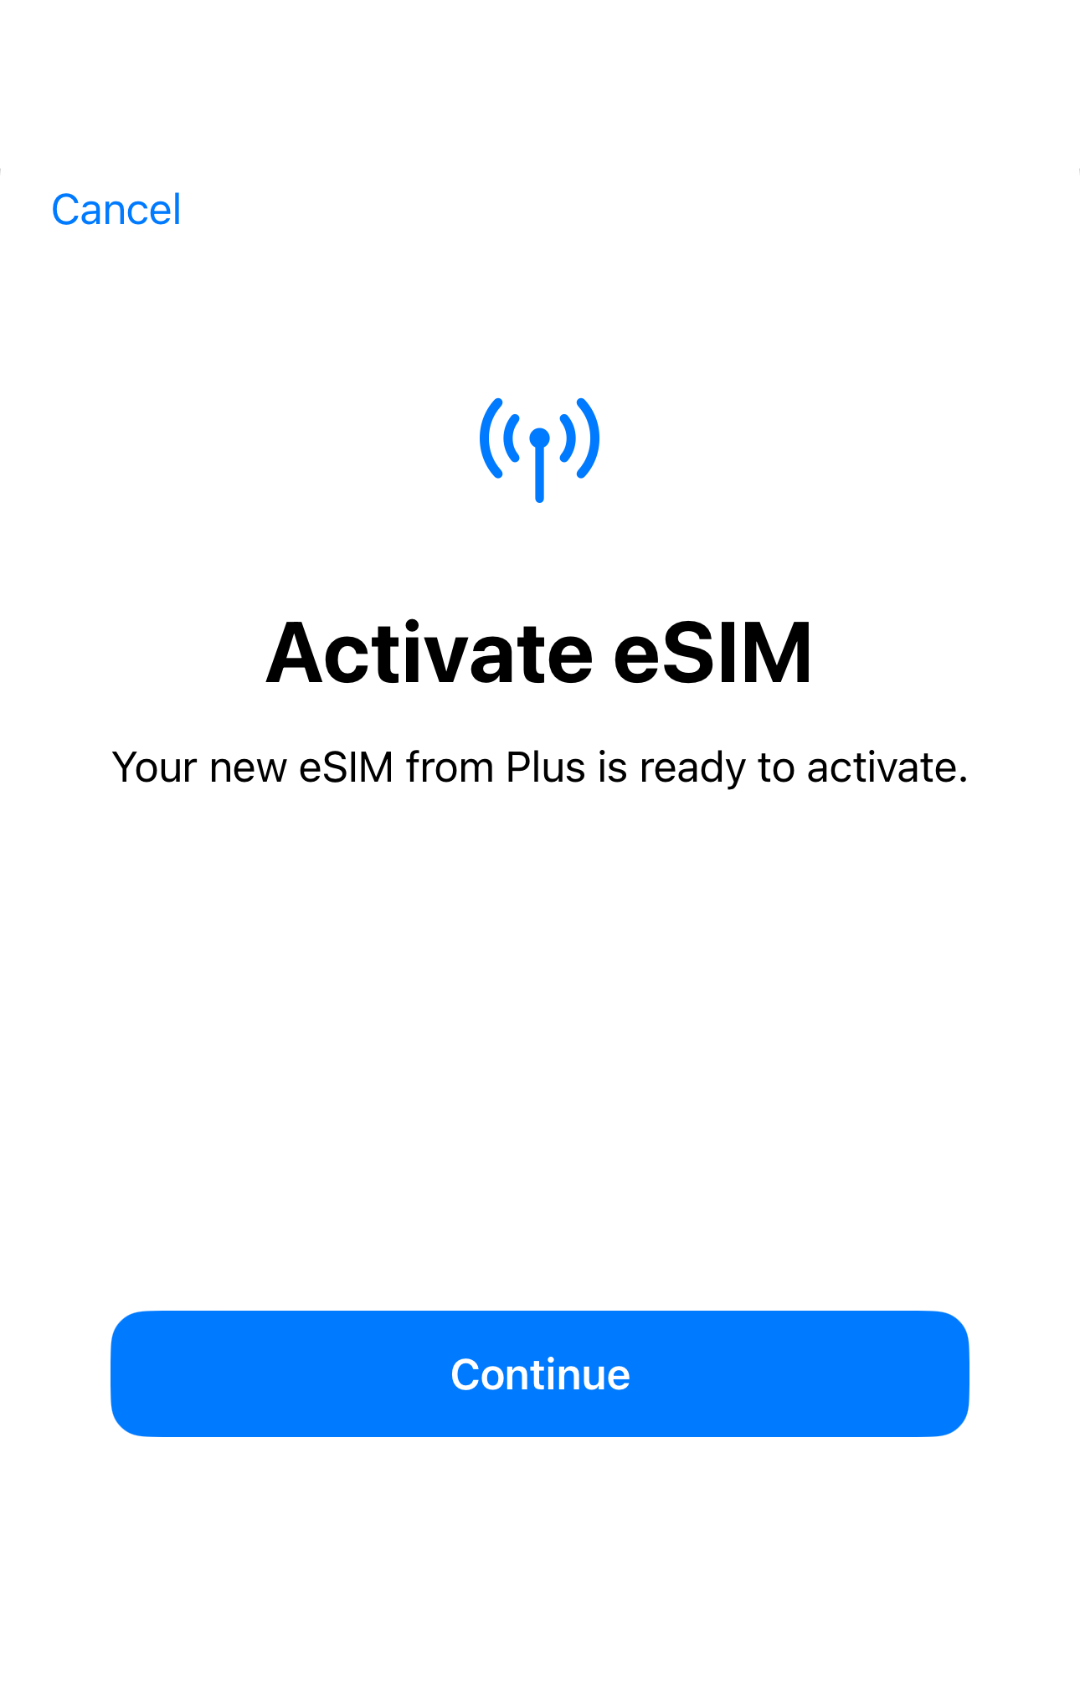
Press on the 'Continue' button. The eSIM might take a bit of time to be activated.
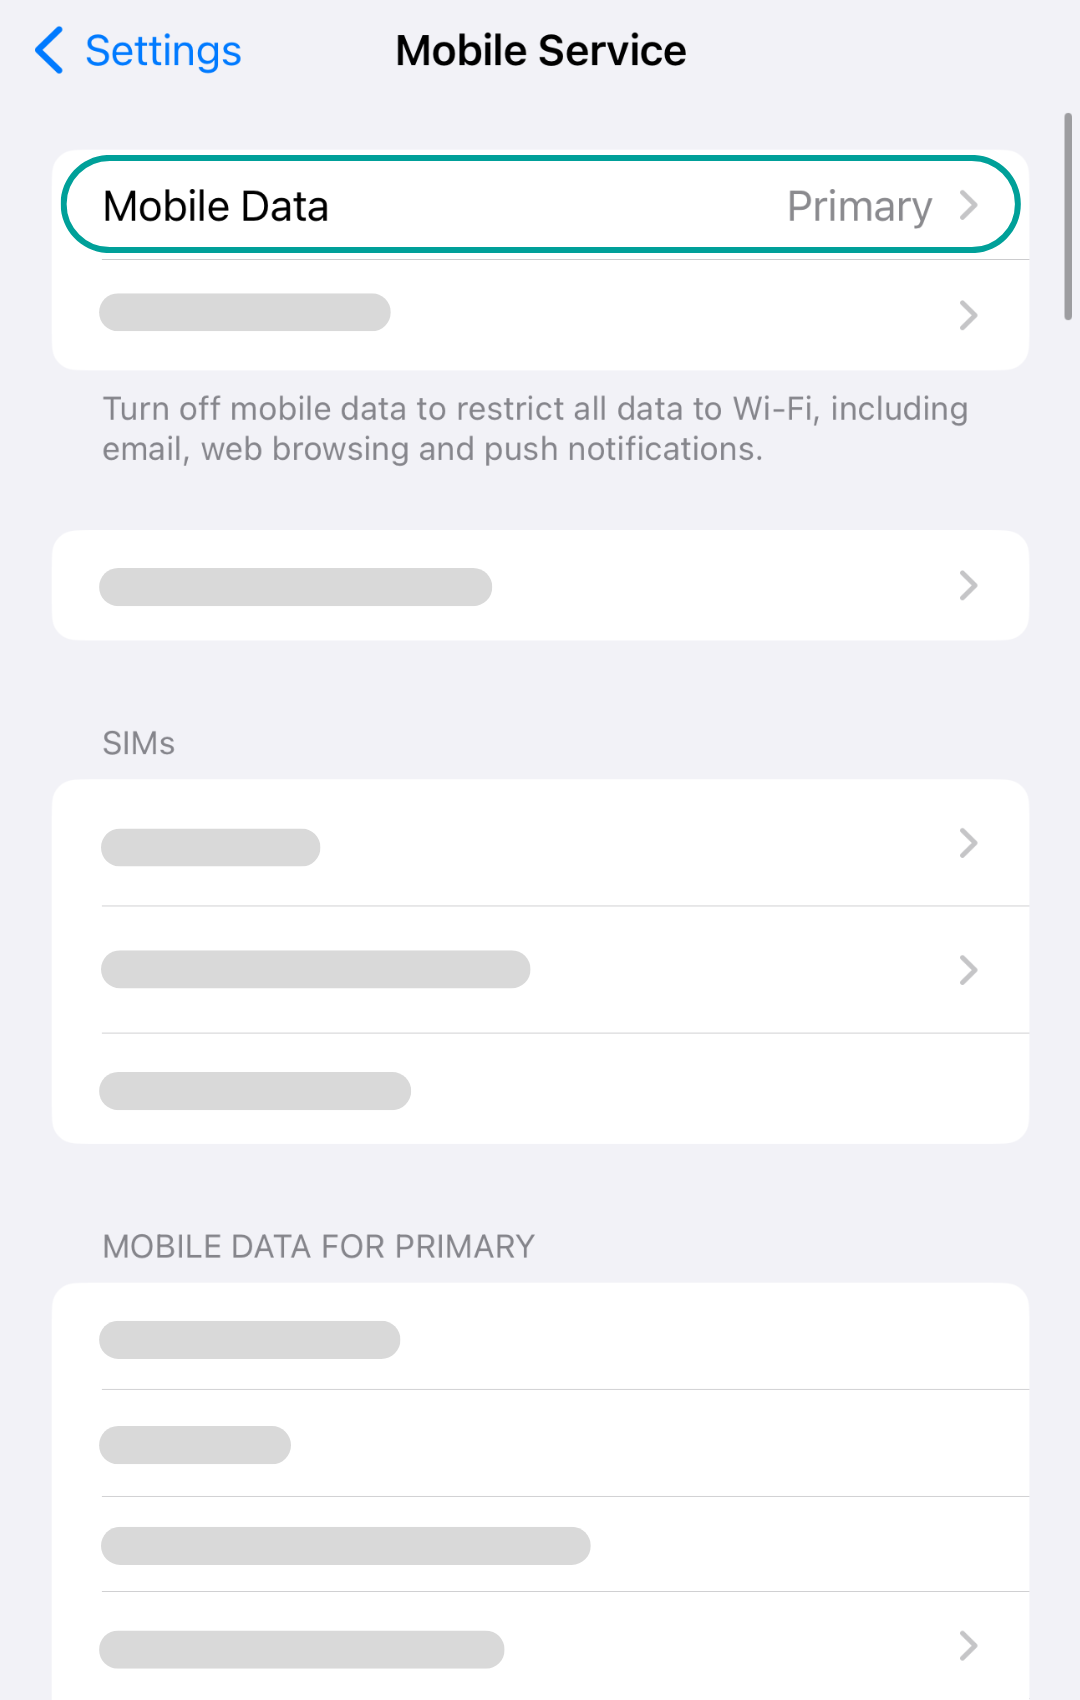
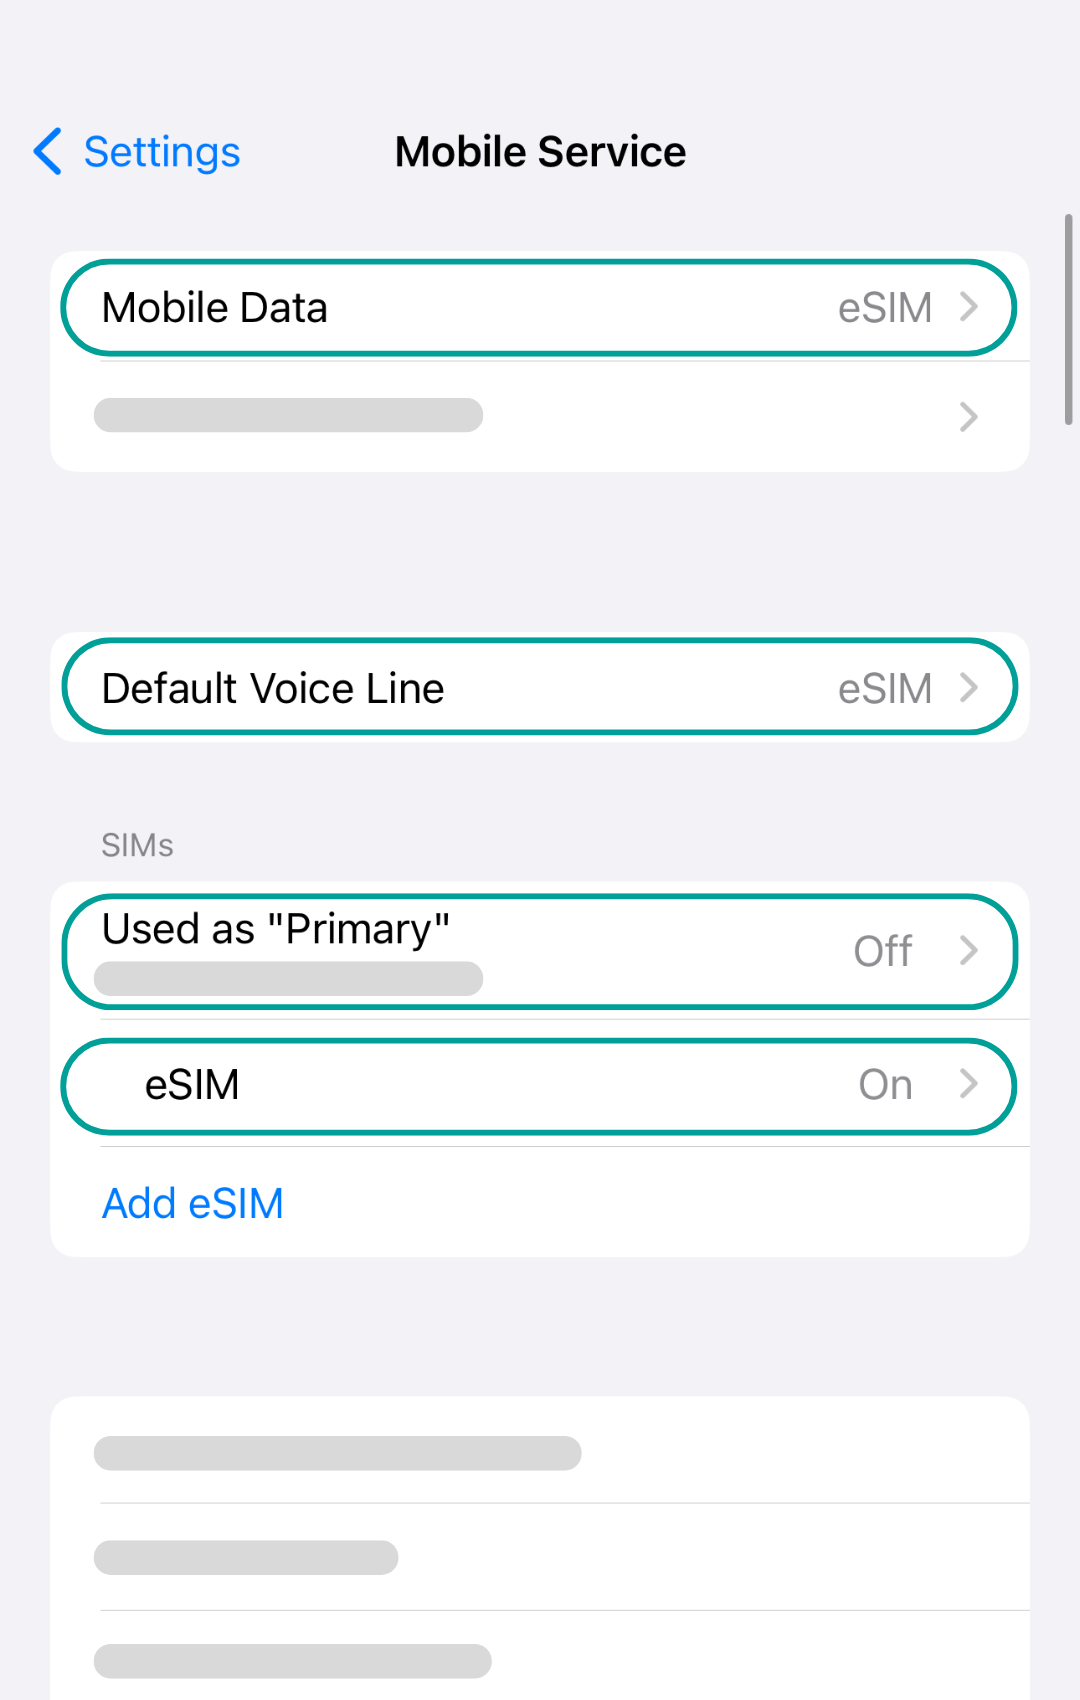
After your eSIM is connected. Go back to the 'Mobile Service' section and choose 'Mobile Data'.
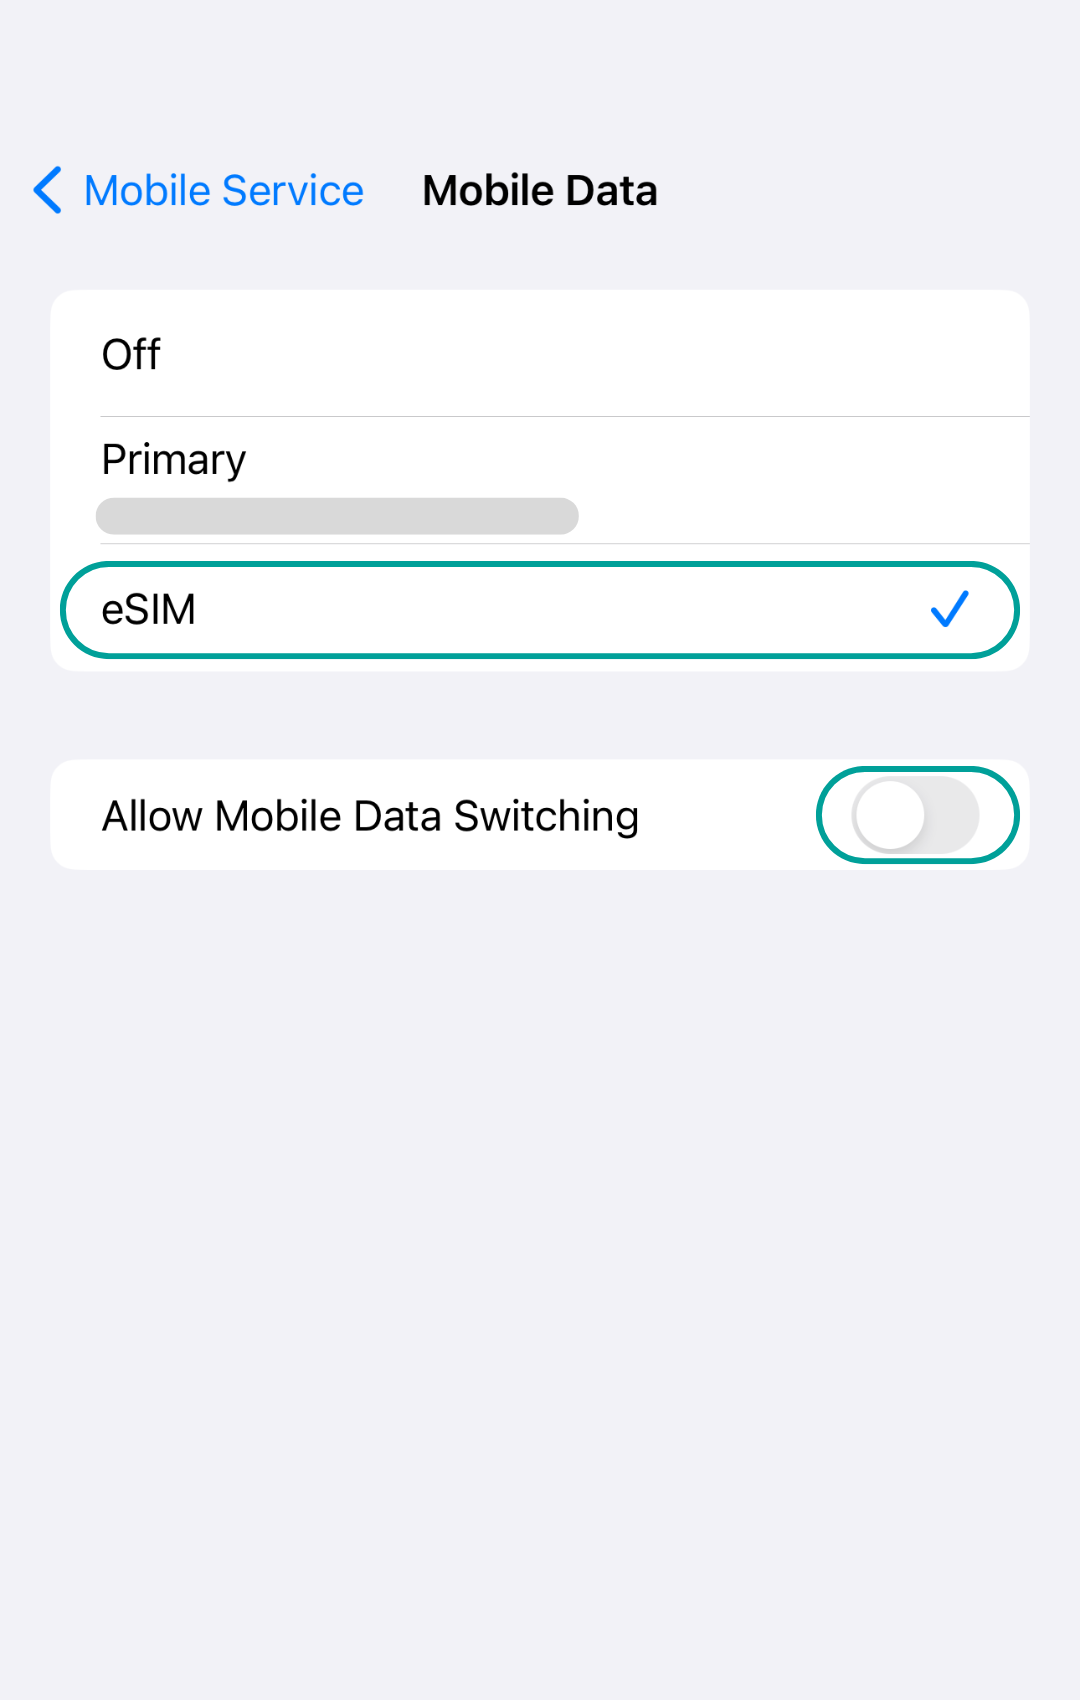
Make sure that the eSIM section is selected and has a blue check mark. Additionally, make sure that the 'Allow Mobile Data Switching" is turned off, this way your device will not accidentally reconnect to your primary SIM and you will not have a bill with high roaming charges after your trip.
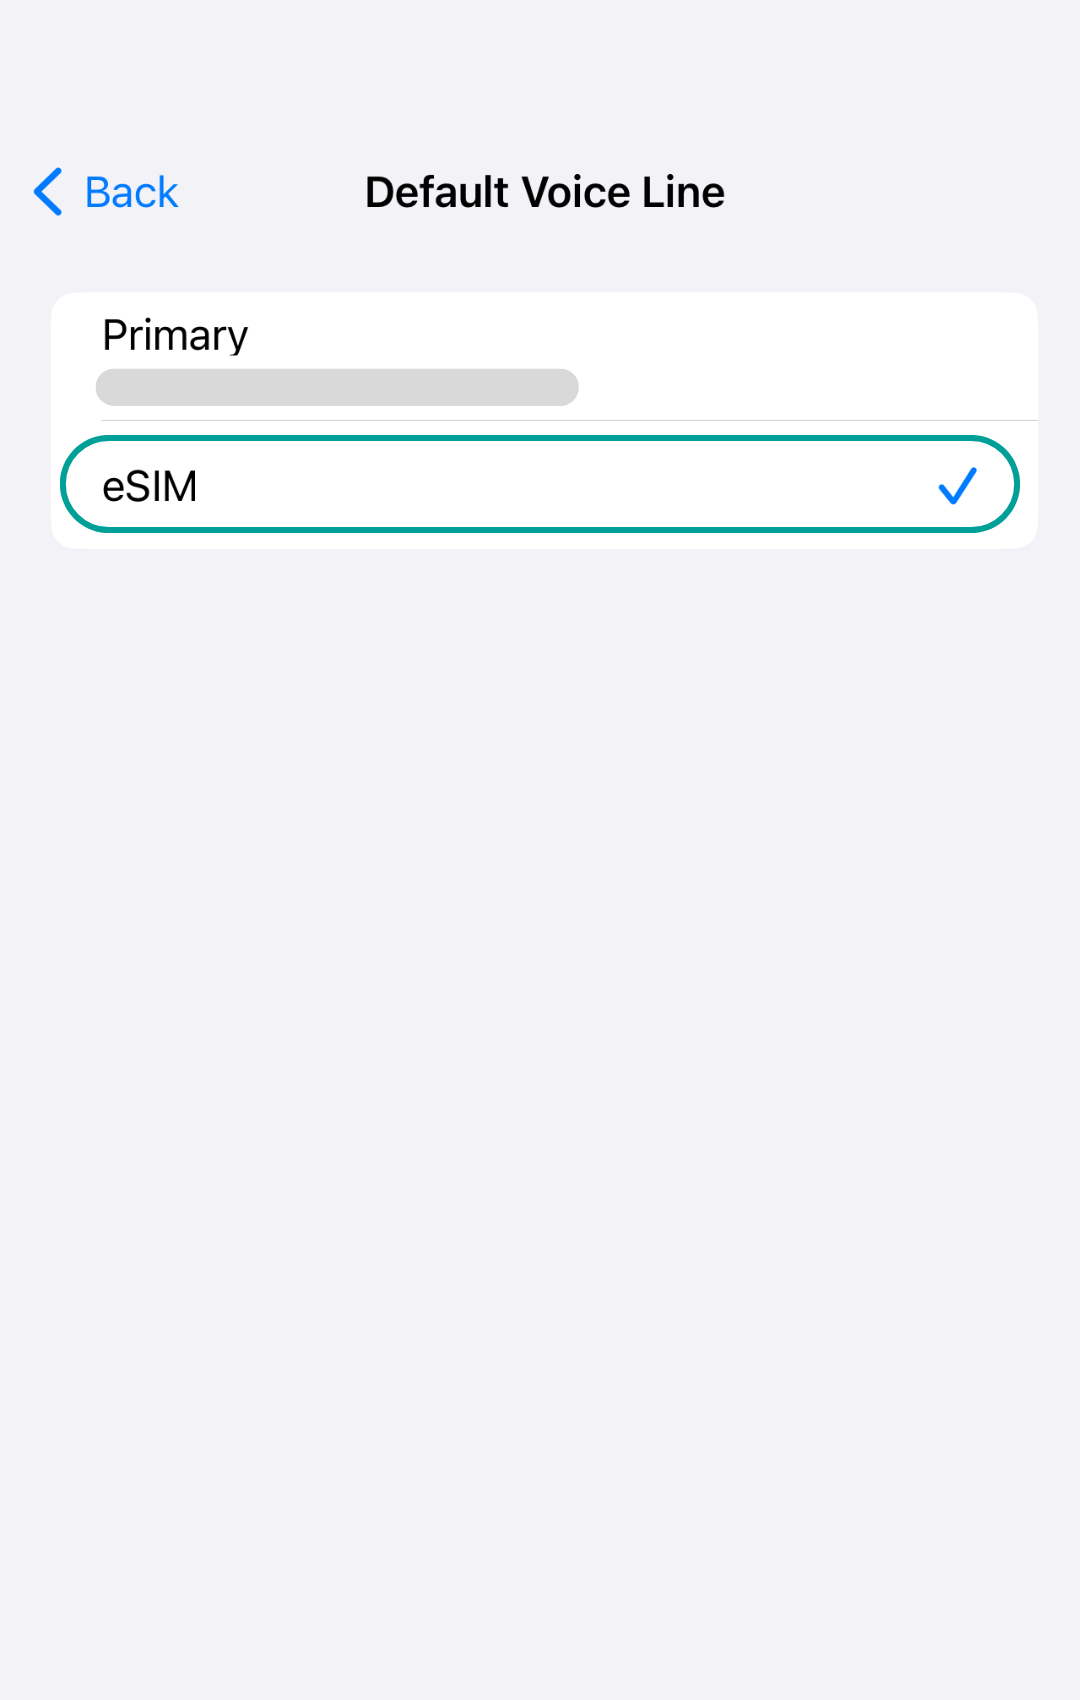
If your eSIM includes voice, go to the “Default Voice Line” section and switch from your primary SIM to your new eSIM.
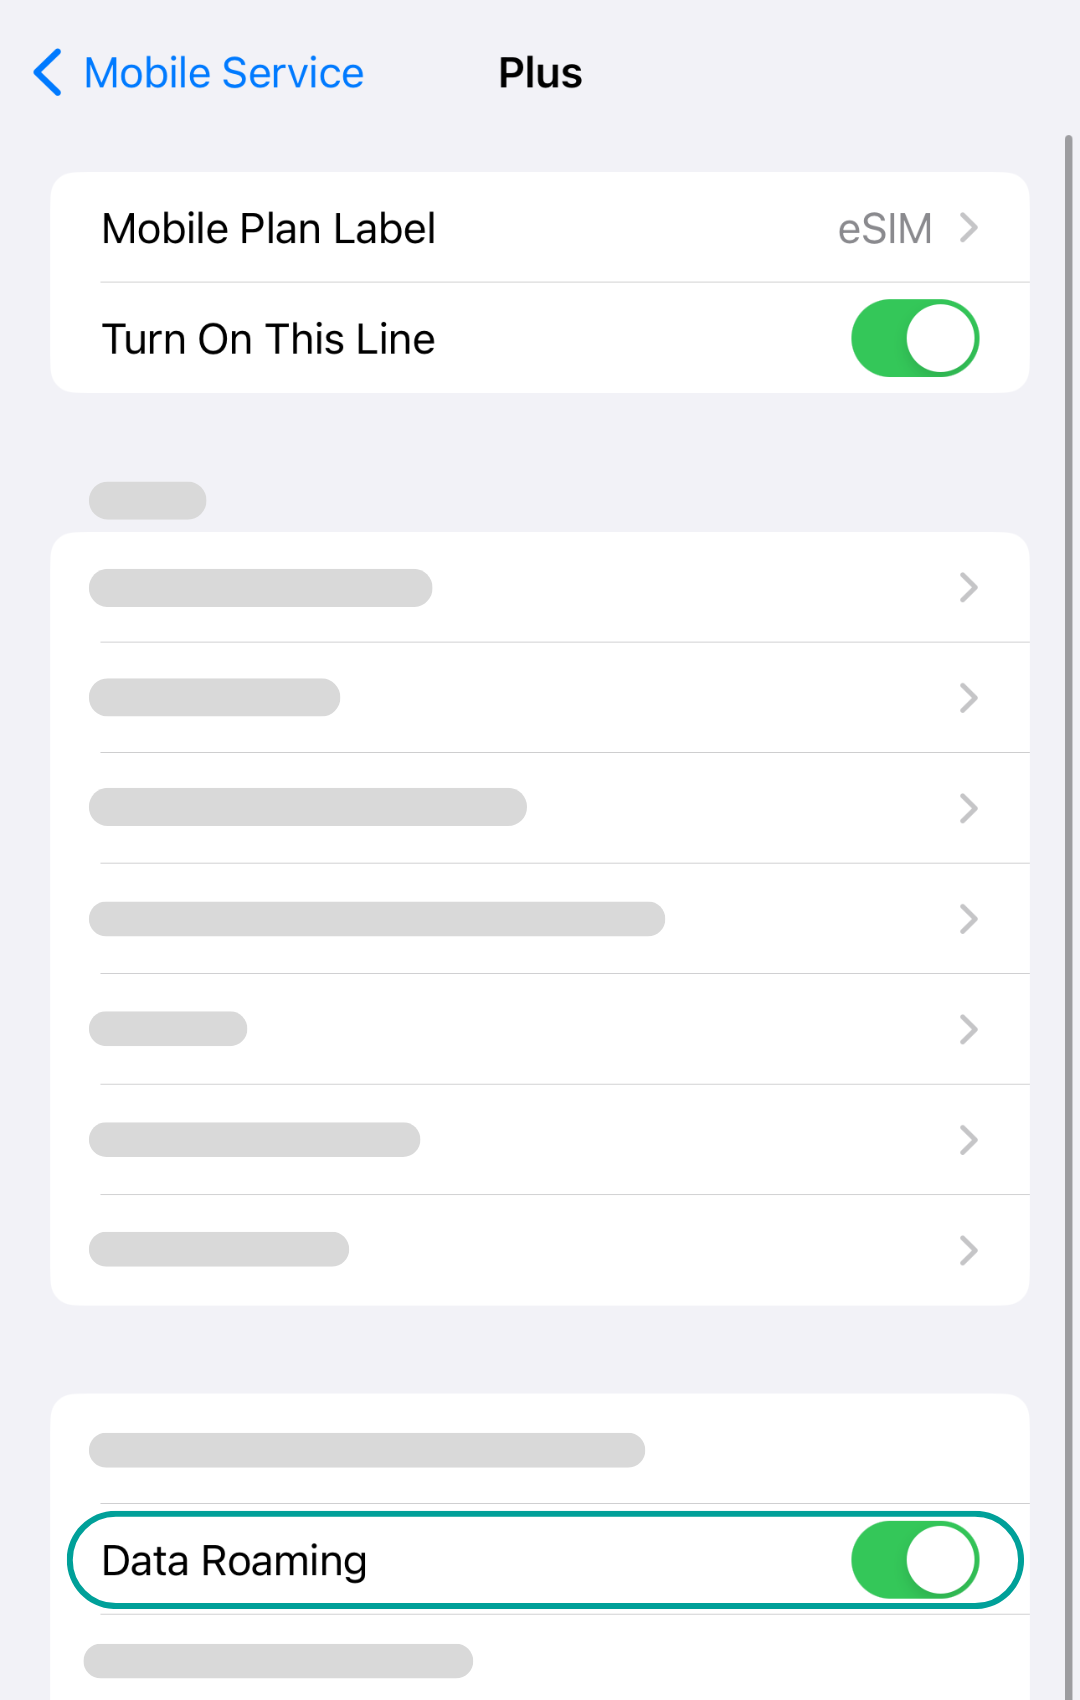
The last step is to go to your eSIM details and turn on your 'Data Roaming'.
Now you are fully set up and ready to go. Enjoy your high speed data plan!
Go to your device Settings and choose the 'Mobile Service' section.
Locate and click on the 'Add eSIM' section.
Choose the 'Use QR Code' option.
Go to your email account and find the eSIM QR code that we have sent to you. Afterwards, scan the QR code.
Press on the 'Continue' button. The eSIM might take a bit of time to be activated.
After your eSIM is connected. Go back to the 'Mobile Service' section and choose 'Mobile Data'.
Make sure that the eSIM section is selected and has a blue check mark. Additionally, make sure that the 'Allow Mobile Data Switching" is turned off, this way your device will not accidentally reconnect to your primary SIM and you will not have a bill with high roaming charges after your trip.
If your eSIM includes voice, go to the “Default Voice Line” section and switch from your primary SIM to your new eSIM.
The last step is to go to your eSIM details and turn on your 'Data Roaming'.
Now you are fully set up and ready to go. Enjoy your high speed data plan!


